Note: HyperImage 3 is currently under development (Beta Version). The functionality and features of the system might change until the general release. This manual will be updated from time to time to reflect the current feature set and functionality.
Introduction · What’s New · Menu Bar · Group Browser · Text Editor · External URL ·
Object Editor · Layer Editor · Tag Manager · Shortcuts
This chapter introduces the Tag Manager and its use.
What are Tags?
![]() Tags are an additional metadatum that can be assigned as a label to any element of a HyperImage project (objects, views, inscriptions, layers, texts, URLs, light tables, and groups). You can assign multiple tags to an element, thereby placing it simultaneously in different categories.
Tags are an additional metadatum that can be assigned as a label to any element of a HyperImage project (objects, views, inscriptions, layers, texts, URLs, light tables, and groups). You can assign multiple tags to an element, thereby placing it simultaneously in different categories.
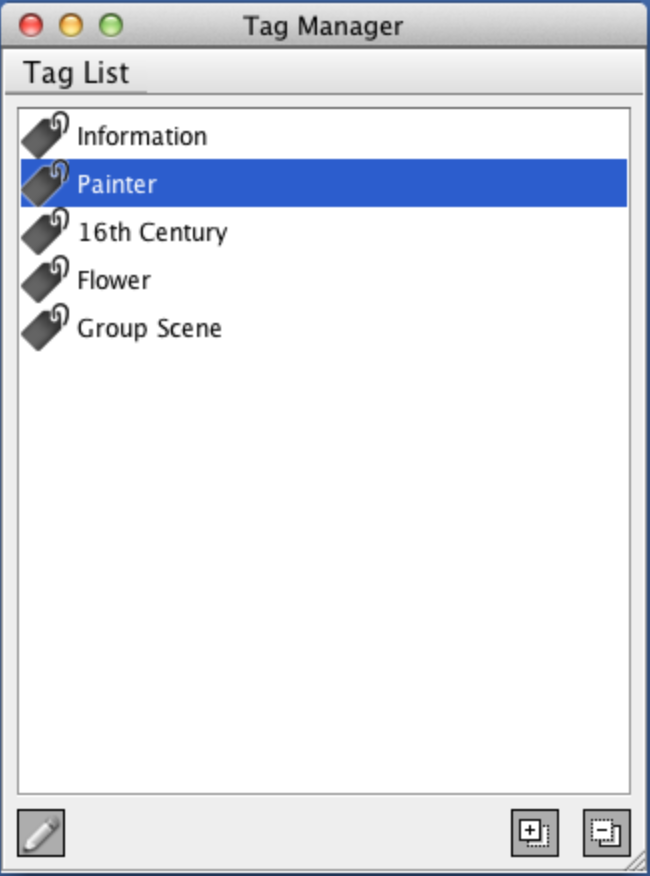
Manage Tag List
The Tag Manager allows you to manage all the tags in your project. You can access it via the menu “Tools” as well as via ![]() 3 (CTRL+3).
3 (CTRL+3).
The Tag Manager provides you with an overview of all current tags in a project and their translations in other project languages, where applicable. Here you can define new tags, translate existing tags and delete tags from a project.
The Tag List displays all the tags defined in a project. Tag names are displayed in the project’s default language.
Adding a Project Tag
![]() Click on the plus sign to add a new tag to the project. The Tag Name Editor opens automatically, allowing you to assign your own name to the new tag, in various translations if applicable.
Click on the plus sign to add a new tag to the project. The Tag Name Editor opens automatically, allowing you to assign your own name to the new tag, in various translations if applicable.
Deleting a Project Tag
![]() Select the tag with the left mouse button. Click on the minus sign to delete the tag from the project and to remove it from all elements, to which it had been assigned.
Select the tag with the left mouse button. Click on the minus sign to delete the tag from the project and to remove it from all elements, to which it had been assigned.
Edit Tag Name
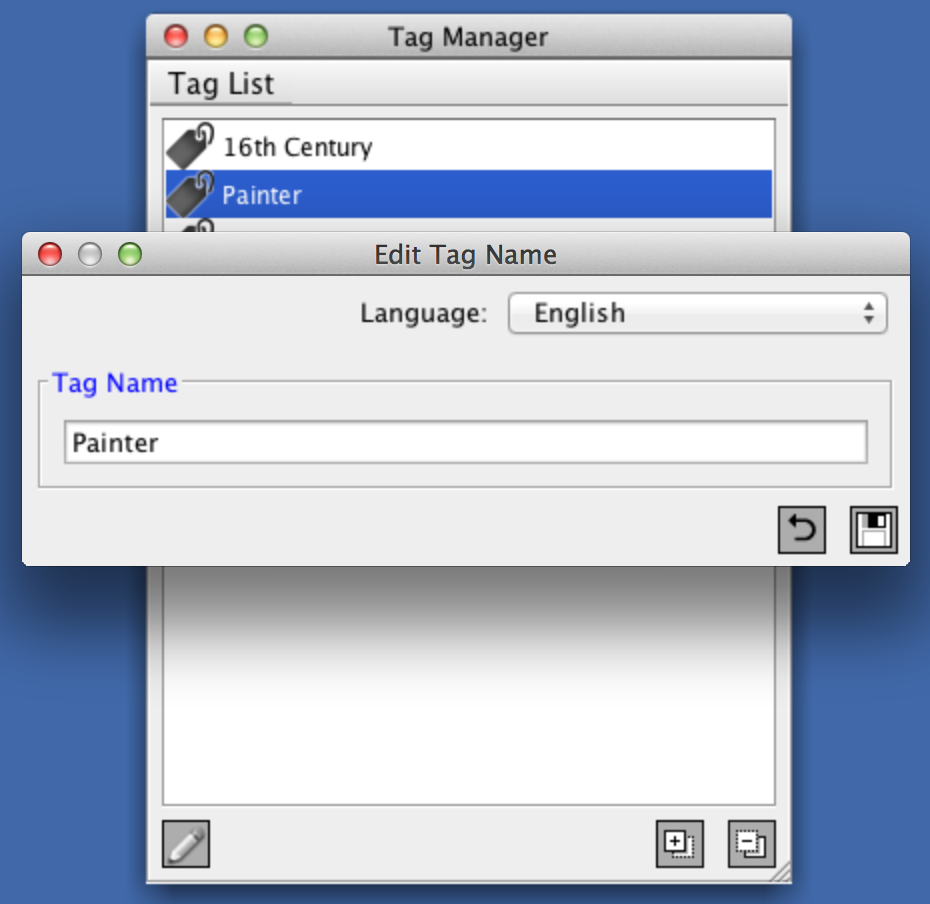
![]() Select the tag with the left mouse button. Clicking on the edit symbol opens the edit dialog, which allows you to edit the tag name in all available project languages. More information on project languages can be found in chapter two, “Project Languages”.
Select the tag with the left mouse button. Clicking on the edit symbol opens the edit dialog, which allows you to edit the tag name in all available project languages. More information on project languages can be found in chapter two, “Project Languages”.
Note: Tag names listed in the Editor are always displayed in the project’s default language.
Reset Name Change
 It is possible to undo changes to a tag name by clicking this button. The tag name is reverted to the last saved state. Please note that the reset action cannot be undone.
Save
 Clicking on the save button saves your changes to the server and exits the tag name editor.
Manage Element Tags
![]() You can asign tags to any element of a HyperImage project by clicking on the “Tags” button at the bottom of the element’s window in the Editor, thus opening the Element Tag Manager. The number in parentheses indicates the number of tags assigned to a particular element.
You can asign tags to any element of a HyperImage project by clicking on the “Tags” button at the bottom of the element’s window in the Editor, thus opening the Element Tag Manager. The number in parentheses indicates the number of tags assigned to a particular element.
 The element’s current tags are highlighted blue . Clicking the x symbol removes that tag from an element.
Clicking on “Add tag…” displays a list of currently unassigned tags. Clicking on a tag name in the list assigns it to this element.
Note: All changes to tag assignments are saved immediately. Exit the dialog by closing the window.
HyperImage Publication & Tags
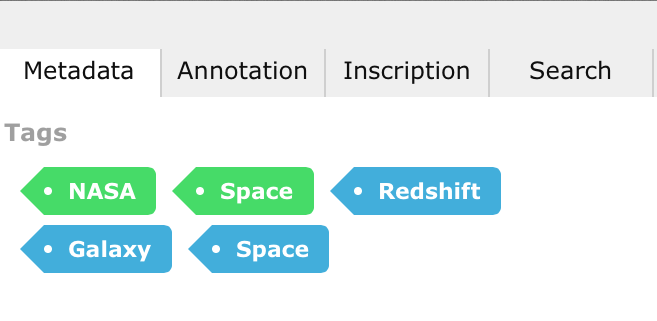 You can view an element’s tags in the project’s HyperImage publication or in the live preview.
Clicking on the Metadata tab of the current element reveals the tags assigned to this element. Clicking a particular tag opens a group with all elements that have also been assigned this tag.
Tags of objects are green , while tags for other elements (e.g. tags assigned to an object’s view) are highlighted blue .
 Note: Tags assigned to a layer are displayed in the tooltip directly beneath the layer’s other metadata.
Open Tag Group
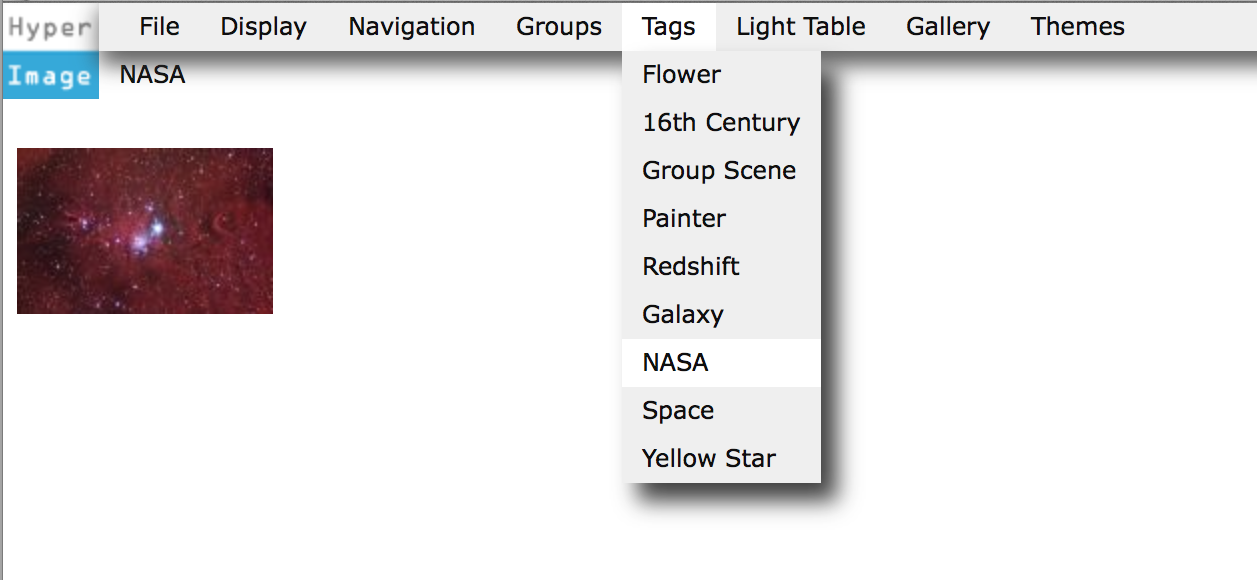 You can also reveal all the elements assigned a specific tag by selecting it in the “Tags” menu.