Note: HyperImage 3 is currently under development (Beta Version). The functionality and features of the system might change until the general release. This manual will be updated from time to time to reflect the current feature set and functionality.
Introduction · What’s New · Menu Bar · Group Browser · Text Editor · External URL ·
Object Editor · Layer Editor · Tag Manager · Shortcuts
Menu “Editor”
Account Data
 In order to get to this menu item choose “Editor” > “Account data” from the menu bar at the top of the screen. Here you can change your personal information such as fist name, last name, e-mail address or your password for HyperImage. The user name can be reviewed as well.
On-Screen Languages
Concerning the on-screen language you can choose between German and English. When changing the language all the menu entries and window labelling will appear in the chosen language. The entered text (metadata) will stay untouched from your choice of screen language. In order to change the on-screen language choose “Editor” > “Display language” from the menu bar. It is planned to offer more languages in the future.
Logout
Choose this option if you want to leave the current project, but don’t want to quit the HyperImage Editor. In order to do this, choose “Editor” > “Log off” from the menu bar or use the keyboard shortcut ![]()
![]() Q (
Q (![]() +CTRL+Q).
+CTRL+Q).
Note: The given keyboard shortcuts refer to a Mac keyboard, the keyboard shortcuts in brackets refer to a Windows keyboard.
Logout and Exit
Choose this option if you want to quit the HyperImage-Editor. To do this choose “Editor” > “Logout and Exit” from the menu bar or use the keyboard shortcut ![]() Q (CTRL+Q).
Q (CTRL+Q).
Menu “Project”
Export…
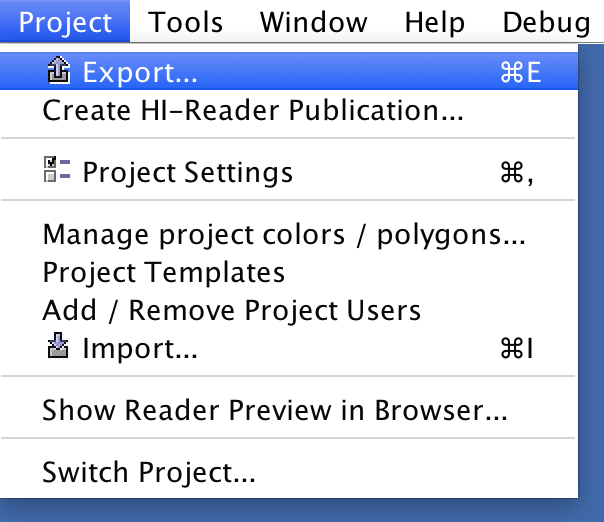 In order to reach this menu item choose “Project” > “Export” from the menu bar at the top of the screen or use the keyboard shortcut
 ![]() E (CTRL+E). The project is then exported in the “PeTAL 3.0” XML format and saved in the directory of your choice, including all the project’s images, if you so choose.
E (CTRL+E). The project is then exported in the “PeTAL 3.0” XML format and saved in the directory of your choice, including all the project’s images, if you so choose.
Note: The current export format is PeTAL 3.0. It supports UUIDs and timestamps, as well as incremental imports.
Publication Tool
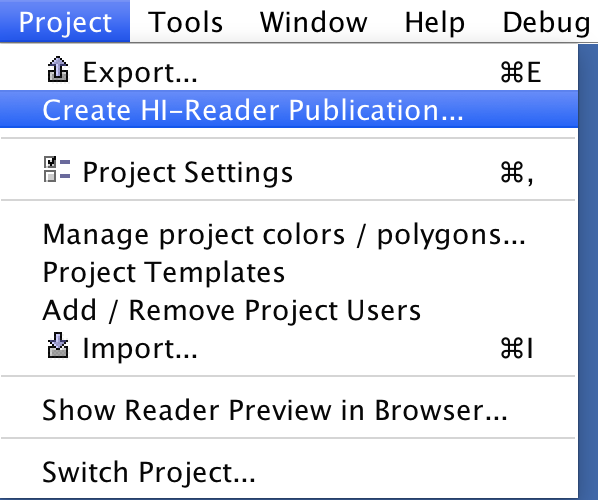 You can publish your project by selecting “Create HI-Reader publication…” in the “Project” menu. This launches the HyperImage PubTool in a Web browser, allowing you to define the menu structure for metadata, groups, text and light tables as well as the visibility of specific groups, texts or light tables in your publication.
Manage Project Colours / Polygons
Choose “Project” > “Manage Project Colours / Polygons” in order to administrate the saved polygons and colours of your project. All the colours and polygons, which can be defined by you in the Layer Editor,  can be put down in the library for colours and polygons. With that they are available to all the users of the project. To delete a polygon or a colour from the library, choose the colour from the field “Colour Library” or a polygon from the field “Polygon Library” and click on the “Remove” button. In order to work on already defined colours, choose the relevant colour and click the “Edit” button. This function is not available for polygons. Please note that these actions will not affect existing Layers of your project.
Project Settings
 In order to get to this menu item choose “Project” > “Project Settings” from the menu bar or use the keyboard shortcut
 ![]() , (CTRL+,). The window “Manage Project Settings” will open. Please note that the project settings are only accessible for project administrators.
, (CTRL+,). The window “Manage Project Settings” will open. Please note that the project settings are only accessible for project administrators.
Project Metadata
Select Language
With this option you can define in which language you want to enter the metadata of the project title. Please refer to section “Metadata Languages” further down for more information on how to add different languages to your project.
Project Title
Enter the title of your project into this field in the chosen metadata language.
Reset
With this function you can reset your entries to the last saved state. Please note that this action cannot be undone.
Save
If you want to exit the window “Manage Project Settings” in which you have made changes to the project title without saving it, you will be automatically prompted if you want to save the changes. You can do this yourself as well, just click on the “Save” symbol under “Project Title” field.
Start Element
This menu item is only relevant for the HyperImage Reader of the Leuphana University Lüneburg. It indicates which element of the project will be shown first (pre-selected) in the Reader.
Metadata Languages
In this item all the available metadata languages are displayed, which you can add to your project. This function offers you the possibility to choose languages in which you want to enter your metadata.
Available Languages
These languages are the languages, which you can import into the column “Project Languages”.
Mark the languages, which you want to have in your range of project languages, in the field “Available Languages” and drag the language(s) into the list “Project Languages” while keeping the left mouse button pressed.
Project Languages
These are the languages that are already imported into your project. Please note that by deleting a language from the project, all the metadata written in this language will be irrevocably deleted as well.
Default Language
This field indicates which is the default language for entering metadata and text. You can choose from the languages in the field “Project Languages”.
Storage Used
It is possible to limit the amount of storage space for a project’s image data. The current amount of storage in use on the server can be viewed in the Project Settings.
Project Templates
If you choose “Project” > “Project Templates” from the menu bar, the window “Project Templates” will open.
In this window you can manage the flexible metadata of objects. This happens by using so called templates, which are prefabricated collections of metadata fields, which are based on international standards (e.g. Dublin Core). Of course you can put together your own subject-specific collection for a corpus as well.
In the Object Editor under “Properties”, current templates in the project can be viewed, new ones added or existing ones deleted.
Please note that the deletion of fields and / or templates will lead to deletion of all the metadata in the field or this template. This action cannot be undone.
Please also note that it is possible to change prefabricated (standards based) templates to make adjustments, but this may lead to incompatibility with the corresponding metadata standard.
Add / Remove Project Users
 There are three different types of user roles, which are linked to certain access rights in the Editor. Users can be added to / deleted from the project via drag&drop.
Guests
Guests can access the projects they are signed up for, but they can’t make changes on the project.
Regular Users
The most common case is that you are logged on as a regular user in a project. In this case you can use all the functions described in this manual without restrictions.
The following functions are reserved for project administrators:
Privileged Users (Administrator)
Project administrators can add or remove users from their project. In order to get to this menu item choose “Project” > “Manage Project Users” from the menu bar. Please note that user administration is reserved for project administrators only.
Import…
You can import projects in the PeTAL 2.0, 3.0 or VRA Core 4 xml formats. The PeTAL 3.0 and VRA Core 4 formats now support incremental imports into existing projects, thanks to the introduction of UUIDs. Should images already exist in the project (in the case of an incremental import) then only the metadata associated with those images will be updated. It is therefore no longer necessary for a project to be empty when importing data in the PeTAL 3.0 or VRA Core 4 formats.
Show Reader Preview in Browser
A project’s publication can be previewed from the Editor by selecting “Project” > “Show Reader Preview in Browser…”. Light tables stored with a project can be edited via the preview function and it is now no longer necessary to enter the XML code for the light table into the Editor. The sort order for groups and group content is also previewed.
Switch Project
In order to get to this menu item choose “Project” > “Switch Project” from the menu bar. In case your current account is a member of multiple HyperImage projects, you can change between these projects without having to logout and login again. Further information concerning the log in can be found in chapter 1, section “Log in“.
Menu “Tools”
Open a New Group Browser
 You can open a Group Browser in order to group and/or sort the elements in your project. To do this either type
 ![]() 1 (CTRL+1) or choose “Tools” > “New Group Browser” from the menu bar at the top of the screen.
1 (CTRL+1) or choose “Tools” > “New Group Browser” from the menu bar at the top of the screen.
New Search
 This function makes it possible for you to find elements on the basis of metadata language, a keyword or a field entry of the element in question. To open a search window, type
 ![]() 2 (CTRL+2) or choose “Tools” > “New Search” from the menu bar.
2 (CTRL+2) or choose “Tools” > “New Search” from the menu bar.
A new search window will open. The search window is composed of the sections “Define Search” and “Search Results”. Select a language, type in a keyword or a field entry or refine your search by combining all three search criteria. Click on the symbol “Search” in the at the bottom of section “Define Search” in order to start the search. You’ll find the results, which match your entered data, in the section “Search Results”. You can open and work on these by double clicking. You can also link search results with different elements or put them in a group via drag&drop.
Repository Import
 This function allow importing the (image) material to work on into the project. To do this choose “Tools” > Repository Import” from the menu bar or type
 ![]() 3 (CTRL+3).
3 (CTRL+3).
A Repository window will open which is divided into three sections: “Search Repository”, “Repository Elements” and “Repository Element Metadata”.
Here you can manage accesses to external image repositories. Images in these repositories can be displayed and imported into the project via drag&drop.
Search Repository
In this section you’ll find all the repositories, which are taking part in the HyperImage project and from which you can import elements.
Click on the repository from which you want to import data and enter the user name and password. Please ask the project partners that managing the repositories about login credentials.
Repository Elements
Once you’ve selected a Repository, you can export or import files from it. Choose the desired file and drag it into your project (while keeping the left mouse button pressed). The imported file will show up automatically in the Import group if it hast not yet been assigned to a different group.
Repository Element Metadata
Here you can view the metadata of the file in the external repository and that will be imported together with the file.
Menu “Window”
Switch between Windows
 If multiple windows are open at the same time, you can switch back and forth between them by typing
 ![]() > (CTRL+>) for the next window or
> (CTRL+>) for the next window or ![]() < (CTRL+<) for the previous window. This menu item can be found under “Window” > “Next Window” or “Window” > “Previous Window” respectively in the menu bar at the top of the screen.
< (CTRL+<) for the previous window. This menu item can be found under “Window” > “Next Window” or “Window” > “Previous Window” respectively in the menu bar at the top of the screen.
Hide Metadata
![]() If you want to hide the Metadata section of the current window you can choose “Window” > “Hide Metadata” from the menu bar or use the shortcut
If you want to hide the Metadata section of the current window you can choose “Window” > “Hide Metadata” from the menu bar or use the shortcut ![]() M (CTRL+M). The Metadata section of current the window will be hidden and the area in the middle will be enlarged.
M (CTRL+M). The Metadata section of current the window will be hidden and the area in the middle will be enlarged.
 Display Open Windows
Choosing “Window” from the menu bar, will display a list of all the windows currently open in the Editor after the item “Hide Metadata”
Menu “Help”
About HyperImage Editor
 By choosing “Help” > “About HyperImage Editor” drom the menu bar you can see which version of the Editor you are currently using.
Contents
This will open the HyperImage 3 Online Manual in a new browser window.
Visit Website
By choosing “Help” > “Visit WebSite” from the menu bar the website http://hyperimage.ws/ will open where you can find more information about and a technical description of the HyperImage Editor.