Note: HyperImage 3 is currently being developed (Beta Version). The functionality and features of the system might change until the general release. This manual will be updated from time to time to reflect the current feature set and functionality.
Introduction · What’s New · Menu Bar · Group Browser · Text Editor · External URL ·
Object Editor · Layer Editor · Tag Manager · Shortcuts
In this chapter you will get to know the functions of the Layer Editor.

The Layer Editor allows you to mark regions of an image in different colours by drawing polygons within different layers. Layers can have metadata in multiple languages consisting of a name and an annotation as well as being linked to any other elements of the project. This link is called up by clicking on the polygons of the layer in the HyperImage Reader or in the preview of the Object Editor (double click or right mouse button).
Opening the Layer Editor
 Select an object in the Group Browser and open the Object Editor. In the section “View Details” click on the “Edit Layers” icon. Alternatively you can right-click on an existing polygon and select “Edit Layers” from the context menu or double click the desired region in the section “Object view”.
The Layer Editor is divided into three sections: “Layers”, “Modify polygons” and “Layer Properties”. In “Layers” you can see the layers and their respective colours of your image and select individual layers. The section “Modify polygons” contains the polygon editor and the central part of the whole HyperImage Editor. In “Layer Properties” you can work on metadata, links, colours of the layers.
“Layers” Section
 Create Layers
Click the “+” icon in the “Layers” Section. A new layer with pre-chosen title is added, which you can start working on immediately. Alternatively you can right-click in the “Layers” section and select “New layer” from the context menu.
Selecting a Layer
Select a layer from the “Layers” section by clicking on the relevant layer. If you have already drawn polygons, you can also select a layer via its individual polygons, by right-clicking on a polygon inside the “Modify polygons” section and then selecting “Polygon Layer” from the context menu. As long as your mouse is not within the “Modify polygons” section, a bright border will emphasize the polygons of the currently selected layer.
Sort Layers
You can sort single layers by clicking on the name of a layer in the “Layers” section and (while keeping the mouse button pressed) dragging the layer to the chosen position in the list.
Copy Layers into a Different View
You can copy single layers to different views. Open the view, into which the layer should be copied, in a new Layer Editor window. You copy the layer by clicking on the name of the layer that you want to copy in the “Layers” section while keeping the mouse button pressed and dragging the layer to the chosen position in the list of the other view. While doing this all the polygons as well as the layer colour and the transparency settings are copied.
Put Layers in Groups
You can put layers, like all the other elements too, into a group via drag&drop.
Open a Group Browser and in the Layer Editor select the layer that you want to copy into a group from the “Layers” section. Drag the layer from the Layer Editor to the Group Browser window and in the section “Groups” on the chosen group and let go of the mouse button.
Delete Layers
Select the relevant layer in the “Layers” section and click on the “-” icon (remove) underneath the section “Layers”. Alternatively you can right-click inside the “Layers” section and select “Delete current layer” from the context menu.
“Layer Properties” Section
Here you can work on different properties of the layers.
Link Target
In this area you can link layers of different images to any elements of your HyperImage project.
Link Layers to Each Other
Open the different images each in a Layer Editor. In the “Layers” section select the layer to which another layer of another image should be linked to. Now in the Layer Editor, which contains the layer to be linked (Link Target), select this layer and keep the mouse button pressed while dragging the layer to be linked in the “Link Target” section of the first Layer Editor. Now you can let go of the mouse button. Both layers are now linked to each other. You can repeat this for any number of layers. If the chosen layer lies in a group (see above) you can drag this layer directly from the group and link it to the currently selected layer.
Link Elements with Images
Open the image in which you want to place a link in a Layer Editor. You can open the image to be linked either from a Group Browser where it is visible in the section “Contents” or you can open it from an Object Editor where it is visible as an image in the section “Object Views”.
Select the image and keep the mouse button pressed while dragging the image into the section “Link Target”. Now let go of the mouse button. The layer and the image are now linked to each other.
Open Link Target
In the section “Layer Properties” right-click on the link target that you want to open and select “Open link target” from the context menu. The link target will open in a new window. Alternatively you can double click on the link target area with the left mouse button.
Deleting a Link
In the section “Layer Properties” right-click on the link target that you want to delete and select “Delete link” from the context menu.
Layer Colour
In order to visually distinguish between layers you have the option to assign different colours to the layers of your image.


Assigning a Colour to a Layer
Select a layer in the section “Layers”. Now go to the section “Layer Properties” and into the “Colour” menu. It is possible that other participants of the project have already defined various colours. You can however define your own colours as well by selecting “Colour” > “Own”. If you have chosen a colour it will assigned automatically in a colour field of the colour selection dialogue (“Last used”) and stay in this field until you quit the Editor.
Adding a New Colour to the Colour Library

If you want a colour, that you have defined, to be available as a selection in order to reuse it on other layers in the future, you can save these colours in the colour library. You can acces the colour library via the menu bar at the top of the screen by selecting “Project” > “Manage project colours and polygons”. You can find further information on this subject in chapter 2 under “Manage project colours and polygons“.
Set Layer Opacity
In the section “Layer Properties” use the “Transparency” slieder or type in opacity percentage directly into the field next to the slider.
Metadata
Set Language
With this option you can define in what language you want to write the metadata of the layer. You can find further information on how to add different languages into the language selection in chapter 2 under “Project settings“.
Layer Title
Enter the layer name in the “Title” field under the section “Layer Properties”. If you have selected the default project language, after saving, the title will appear in the list of the layers on the left panel as well as under thumbnails of this layer.
Annotations
In this field you can write texts of any length. You can use between the styles “regular”, “bold”, “italic”, “underline” or “text as link” but you may not combine these options. Darüber hinaus können Sie Text auch “Hochgestellt” oder “Tiefgestellt” darstellen lassen. Dies kann insbesondere für die visuelle Kennzeichnung von Fußnoten nützlich sein. Please note that there is only one font available.
If you require further formatting options or fonts, you can use the “Insert Foreign Markup, Code or Preformatted Text” function.
Mark Text as Link (Hyperlink)
If you have written a text, which should link to another element, proceed as described in the section “Mark text as link (Hyperlink)” in chapter 3.
Tags
![]() The “Tags” button allows you to label layers with tags. The current number of tags assigned to a layer is displayed in parentheses. The section “Managing Element Tags” in the chapter “Tag Manager” explains how you can assign tags to elements, as well as other relevant information on managing your project’s tags.
The “Tags” button allows you to label layers with tags. The current number of tags assigned to a layer is displayed in parentheses. The section “Managing Element Tags” in the chapter “Tag Manager” explains how you can assign tags to elements, as well as other relevant information on managing your project’s tags.
Undo Changes
 If you have not saved yet the polygons and layer properties in a layer, you can reset all changes using the “Reset” button. The last saved state of the layer is restored. This step cannot be undone.
Save Changes
 Any time when you switch to another layer you will be prompted if you want to save changes (if any). You can do this yourself as well, just click on the “Save” icon in the section „Layer Properties”.
“Modify Polygons” Section
Polygons
Polygons are for marking and emphasizing single regions of an image.
 You can combine polygons on a layer to create complex forms. Please note that two overlapping polygons of the same plane cancel each other. The overlapping section becomes transparent. This way you can create “holes” in your polygon forms. After exporting these transparent sections cannot be clicked on in the HyperImage Reader.
When selecting a polygon a black and white rectangle appears around the polygon. When moving the mouse cursor over a layer name in the “Layers” section, the edges of the polygons of this layer will light up in white.
Creating New Polygons with the Different Drawing Modes
You can create new polygons by selecting a Drawing Mode from the button bar to the left of the image. The mouse cursor changes when a drawing mode is selected.
![]() You can select from “New Freehand Polygon”, “New Flowing Freehand Polygon”, “New Rectangle”, “New Circle”, “New Arrow” or “Layer Isolation Mode”.
You can select from “New Freehand Polygon”, “New Flowing Freehand Polygon”, “New Rectangle”, “New Circle”, “New Arrow” or “Layer Isolation Mode”.
Note: If the current view does not yet contain any layers, then a new layer will be created automatically when a drawing mode is activated.
Freeform
If you have chosen this option the icon for “Modify Polygon” appears at the place where you have clicked in the image, the mouse cursor switches to drawing mode.
![]() In order to relocate the starting point, move the mouse over the starting point until the cursor switches to relocate mode. You can now relocate the starting point by keeping the mouse button pressed and move it within the image to the chosen position. You are now ready to put in place frame points, which are connected automatically with each other to form a polygon by clicking on the desired points of your image. Close the polygon path by clicking on the starting point of the polygon, the cursor switches to connect mode. The polygon is now a closed shape.
In order to relocate the starting point, move the mouse over the starting point until the cursor switches to relocate mode. You can now relocate the starting point by keeping the mouse button pressed and move it within the image to the chosen position. You are now ready to put in place frame points, which are connected automatically with each other to form a polygon by clicking on the desired points of your image. Close the polygon path by clicking on the starting point of the polygon, the cursor switches to connect mode. The polygon is now a closed shape.
New Flowing Freeform Polygon
![]() Select this mode if you wish to draw polygons in one go without the mouse (i.e. freehand). Just keep the mouse button pressed and draw the desired shape with the pen. The points are set automatically when moving the mouse.
Select this mode if you wish to draw polygons in one go without the mouse (i.e. freehand). Just keep the mouse button pressed and draw the desired shape with the pen. The points are set automatically when moving the mouse.
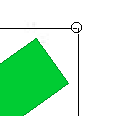
Rectangle
![]() A polygon in the form of a rectangle is created. You can adjust it’s size and position at any time.
A polygon in the form of a rectangle is created. You can adjust it’s size and position at any time.
New Circle
![]() Creates a circle whose size can be adjusted.
Creates a circle whose size can be adjusted.
New Arrow
![]() Creates an arrow whose size can be adjusted.
Creates an arrow whose size can be adjusted.
Layer Isolation Mode
![]() Clicking on this button hides all other layers, leaving only the currently selected layer visible. A stacked layer can thus be edited without affecting the other layers.
Clicking on this button hides all other layers, leaving only the currently selected layer visible. A stacked layer can thus be edited without affecting the other layers.
Load Polygons from Library
You add a polygon from the library. On how to add polygons to the library, please refer to section “Add Your Own Polygons to the Library” further down in this chapter.
Move Polygons


You can move polygons within a layer by selecting a polygon and draging it while keeping the left mouse button pressed.
Rotate Polygons
 You can rotate polygons by clicking the mouse button on the top right corner of the polygonal frame, holding the mouse button while moving the cursor left or right.
Edit Polygons

 You can edit closed polygons at any time. To do this select the polygon that you want to work on. The cursor switches to a cross with a plus and a minus sign and the edge of the polygon can now be selected so that you can add further path points or drag path points to another place. By clicking on an existing path point, it will be deleted. Move a path point by clicking on it and drag it with the mouse button in any direction. In order to add a path point, click with the on an empty space of the polygon outline (path). If desired, keep the left mouse button pressed to move a point afterwards to the place where you want it to be. The different modes of the cursor indicate you if you can add, move or delete the path points. Please note that working on path points is only possible for polygons of the freeform type.
Scale Polygons
 When selecting a polygon there is a small square at the bottom right corner of the selection rectangle of the polygon. Click on the square and drag it with mouse button pressed to make the polygon bigger or smaller.
Select Colour for Polygons
Polygons within a layer cannot have different colours, therefore you can only change the colour of polygons by assigning a colour to the layer where the polygon is. You will find further information about this in section “Layer Colour“.
Add Your Own Polygons to the Library
If you have created a freeform polygon shape that you want to use in other images or layers as well, you can save this form in the polygon library. To do this right-click on the polygon and select “Add polygon to library” from the context menu. From now on when right-clicking in the “Modify Layers” section, your polygon will appear under the menu item “New Polygon”. You can access the polygon library via the menu bar at the top of the screen by choosing “Project” > “Manage Project Colours / Polygons”. For further information on this topic please refer to chapter 2 “Manage Project Colours / Polygons“.
Convert an Already Defined Polygon to Freeform
If you have chosen a predetermined form and want to adjust the polygon path/points, you can extend polygons from the library. In the “Modify Polygons” section right-click on the polygon and select “Extend polygon path” from the context menu. You can now click on the outline of the polygon and add/remove/edit path points.
Copy and Paste Polygons
If you want to use a polygon multiple times without putting it into the library, you can copy it by right-clicking on the polygon and selecting “Copy Polygon” from the context menu. Right-click in the target image section and select “Paste Polygon” from the context menu. You can insert the polygon in the same layer or into a new layer. If you want to insert the polygon in a layer of a different image, open another Layer Editor and add the polygon into a layer that exists there.
Reset Polygon Changes in Layer
If you have not yet saved the changes / new polygons that you made, you reset to the last saved state. In the “Modify Polygons” section right-click and select “Reset Polygon changes on this layer” from the context menu. Now all the polygons within this layer are reset to the last saved state. Please note that this step cannot be undone.
Reset all Polygon Changes
Right-click in the “Modify Polygons” section and select “Reset all Polygon changes” from the context menu. Now all the polygons of all layers in this image are brought back to the last saved state. Please note that this step cannot be undone.
Deleting a Polygon
Right-click on the polygon you want to delete and select “Delete Polygon” from the context menu. If you want to delete all polygons of this layer, you can also delete the layer itself. Doing so will delete all the polygons of this layer as well. Please note that this step cannot be undone.
Zoom
The zoom factor can be controlled with the zoom slider (to the left of the image) or via the mousewheel. You can zoom in to twice the size of the image and out to a minimum of 400×400 pixels.
Image Scrolling
The image scrolls intuitively by moving the mouse cursor on the image while pressing the right mouse button.